


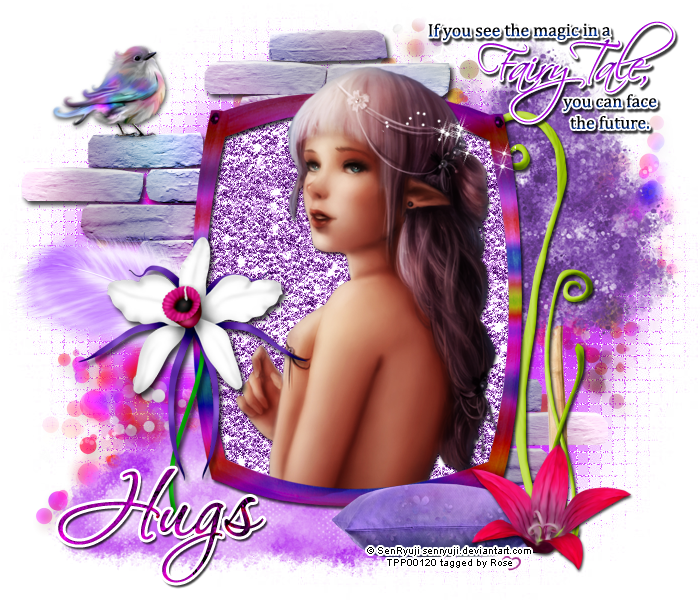
Thursday, 29 November 2012


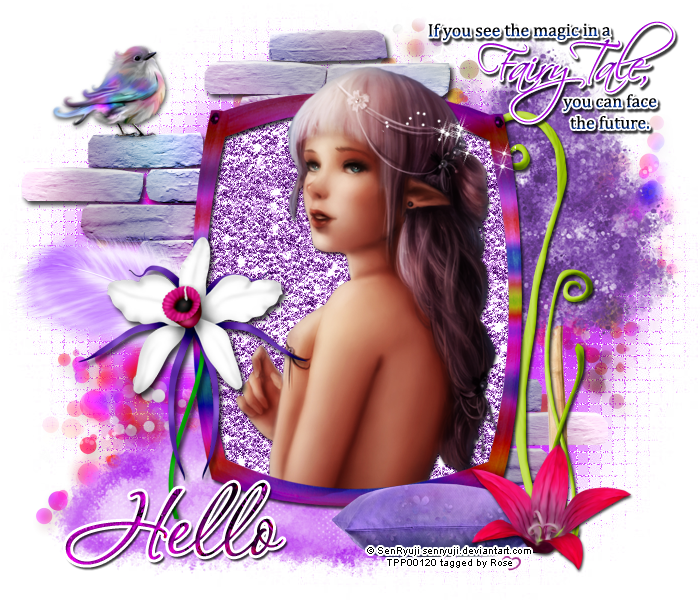
Sunday, 25 November 2012


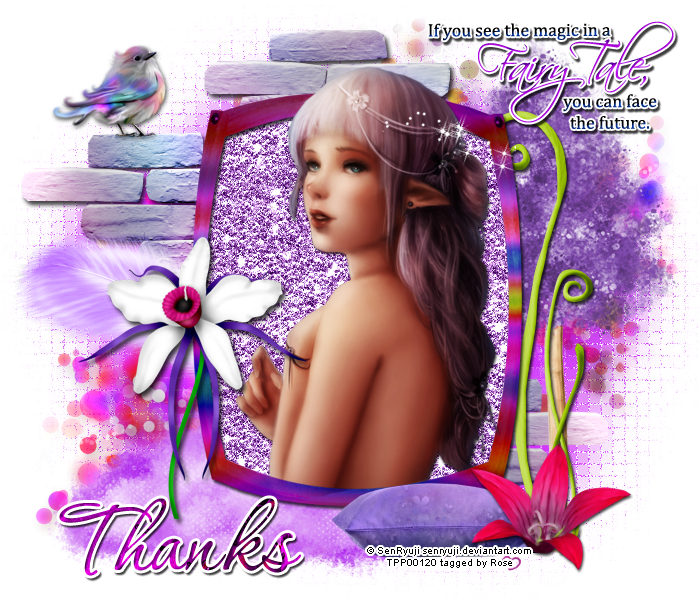
Thursday, 22 November 2012


Wednesday, 21 November 2012
Tutorial written on 21st November 2012
This tutorial assumes you have working knowledge of Adobe Photoshop CS2
♥ Supplies Needed ♥
♥ You Need SATC License number to use this Art
♥ Font of Choice I used 1.Hobo std 2.Cornithia 3. Martina
♥ Mask of choice
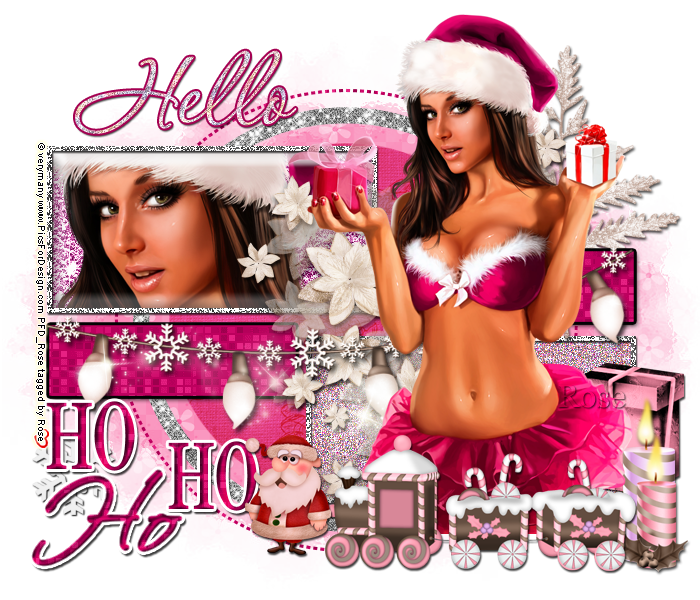
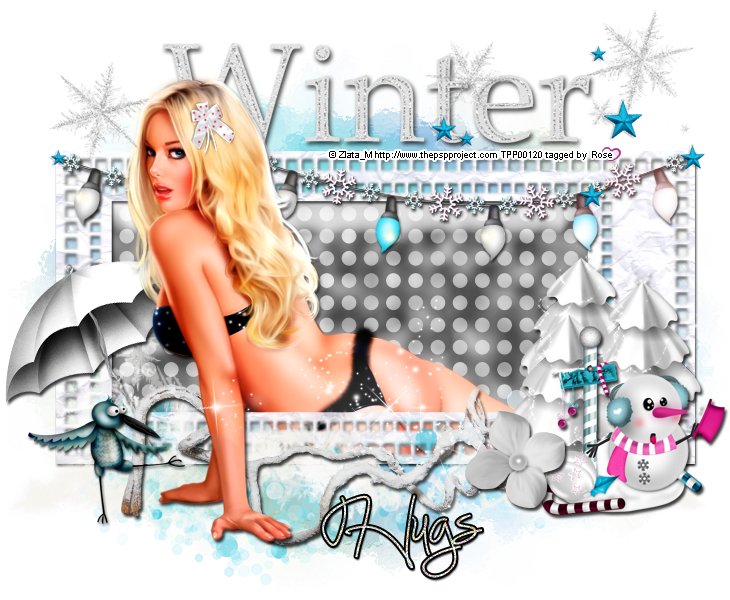
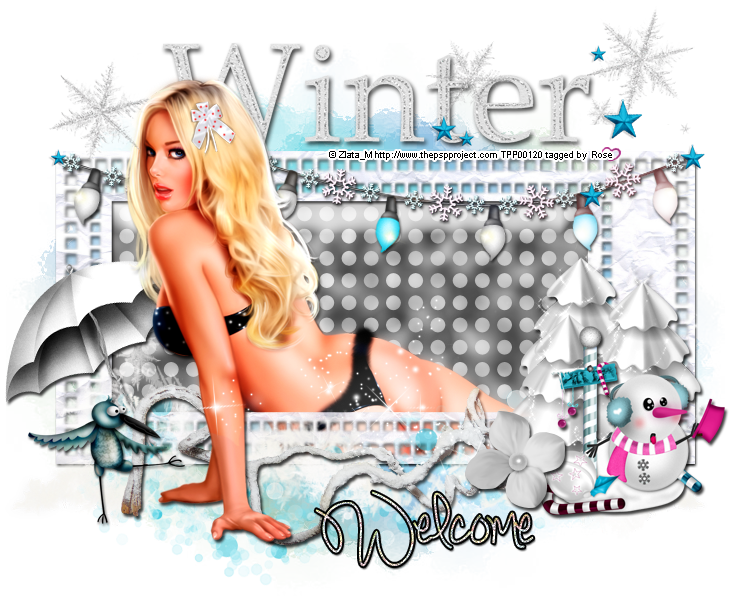
Open new image (ctrl+n) 700 x 600 pxl with white bg color
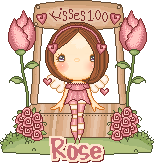
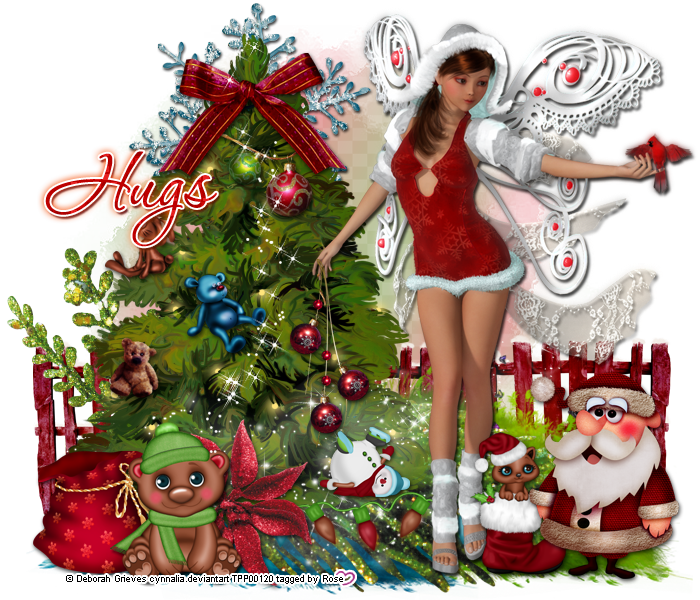
Open element CT_EE21 copy and paste it at center of your image
now open Elelments CT_EE2 (resize 40x40%), CT_EE3 (resize 90x90%),
CT_EE17 (30x30%), paste them on right side behind the layer EE21 as shown in my tag
now Open paper CT_PP11 paste it behind layer CT_EE21 and cut the part sticking out the frame
Open tube Copy and paste it at center of the frame. Resize it 60x60%
Open Element CT_EE 15 (resize 40x40%), CT_EE27 (resize 20x20%),
CT_EE34 (resize 50x50%), copy and paste them at right side of frame, as shown in image
Element CT_EE35 (resize 40x40%) paste it at center lower part of frame behind tube layer
Copy and paste element CT_EE29 behind tube layer and Element CTEE28 paste it on Xmas tree
Add drop shadow to all your elements and tube layer
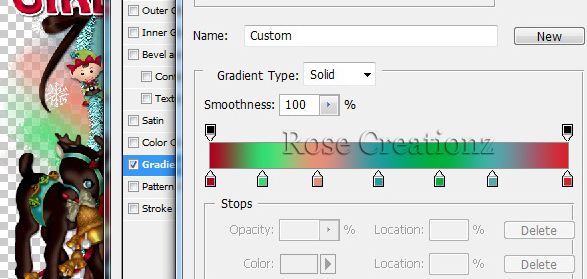
Add mask layer behind all layers and add Gradient overlay
(colors from left to right #ac001a #70bb80 #ef897a #1ea19c #0bb03a #81aaae #d71a2c)
(colors from left to right #ac001a #70bb80 #ef897a #1ea19c #0bb03a #81aaae #d71a2c)
♥ Add copyright info and license number correctly
Add Text (Xmas Girl) add effects stroke (color white) , color overlay #c9022c, Bevel and emoboss size 5 drop shadow, distace 4, spread 55, size 4
2nd Text layer (Name Rose) color overlay (silver or white green glitter pattern) Stroke color black
Add Text (Xmas Girl) add effects stroke (color white) , color overlay #c9022c, Bevel and emoboss size 5 drop shadow, distace 4, spread 55, size 4
2nd Text layer (Name Rose) color overlay (silver or white green glitter pattern) Stroke color black
Now delete your white bg layer and save your image as PNG
I hope you enjoyed this Tutorial 
Friday, 16 November 2012


Tuesday, 13 November 2012

Thursday, 8 November 2012
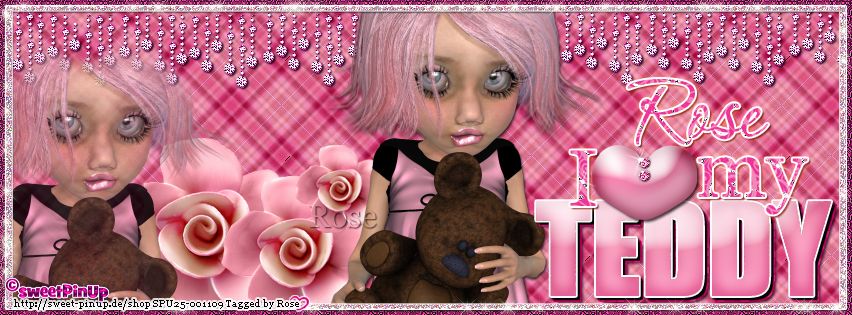
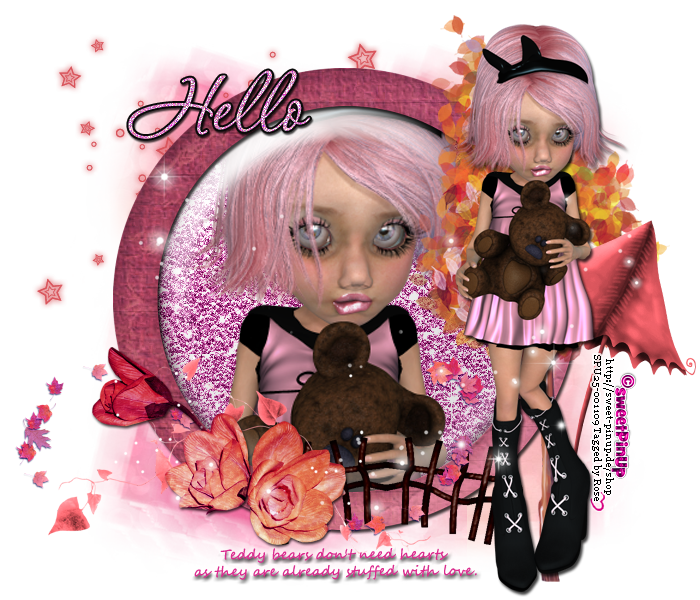
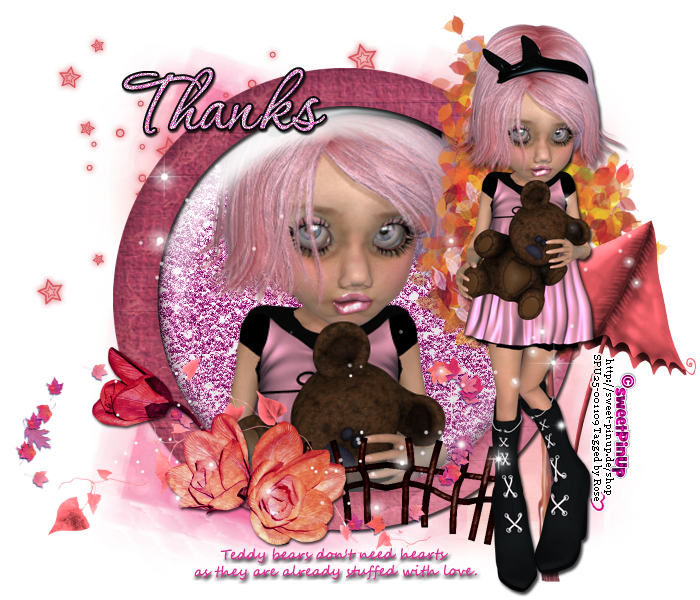
I love my Teddy Fb timeline Cover Featuring PTU SPU-Sally-01 By SweetPinUp
If you want this cover with your name Click HERE
Wednesday, 7 November 2012
Teddy Bear Extras Featuring PTU SPU-Sally-01 By SweetPinUp
PTU Scrap kit Giving is Here By bibi's Collection


Monday, 5 November 2012

Sunday, 4 November 2012
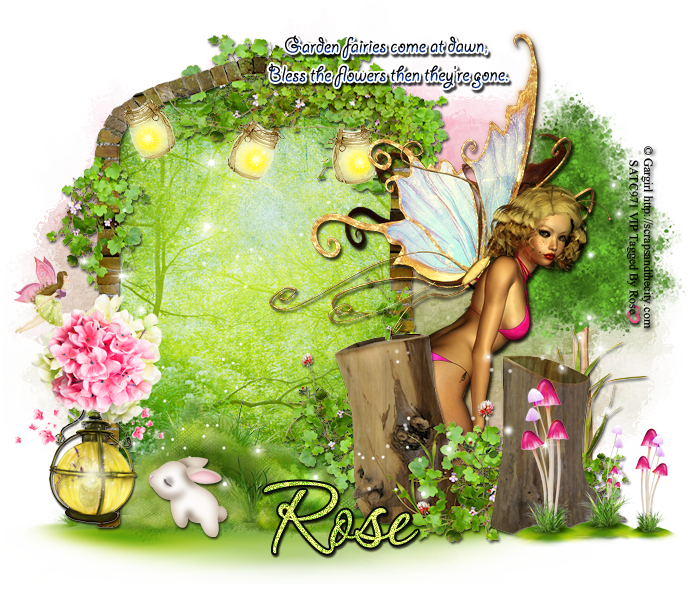
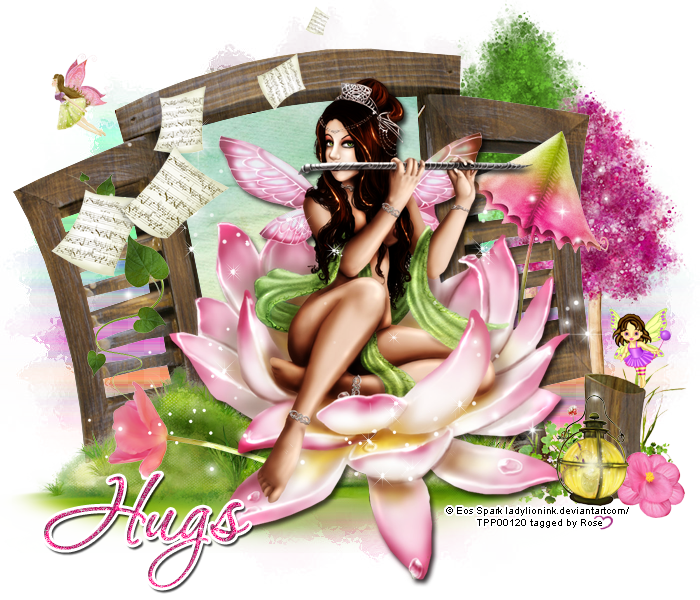
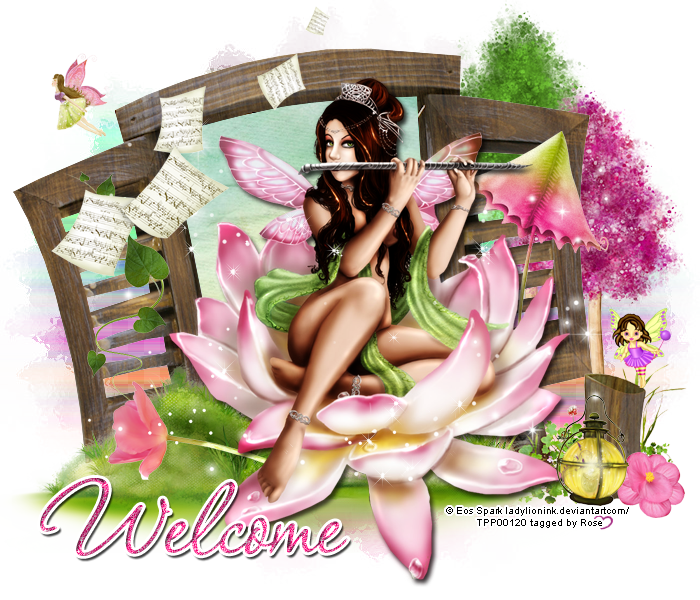
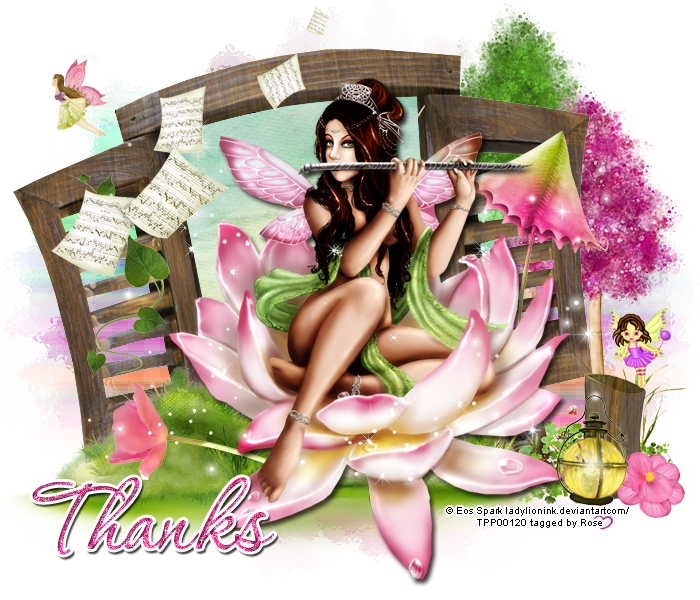
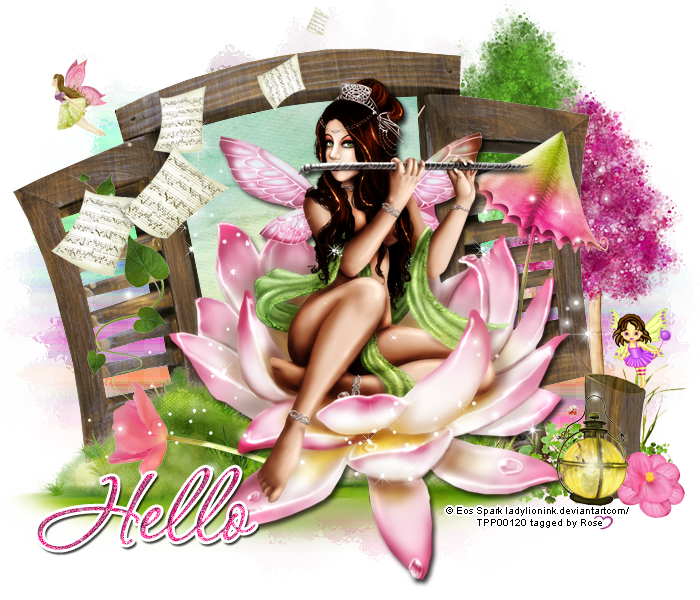
Tutorial written on 4th November 2012
This tutorial assumes you have working knowledge of Adobe Photoshop CS2
♥ Supplies Needed ♥
can be Purchased at SATC
♥ You Need SATC License number to use this Art
♥ Font of Choice I used 1.Giddyup std 2.Cornithia
Mask of choice
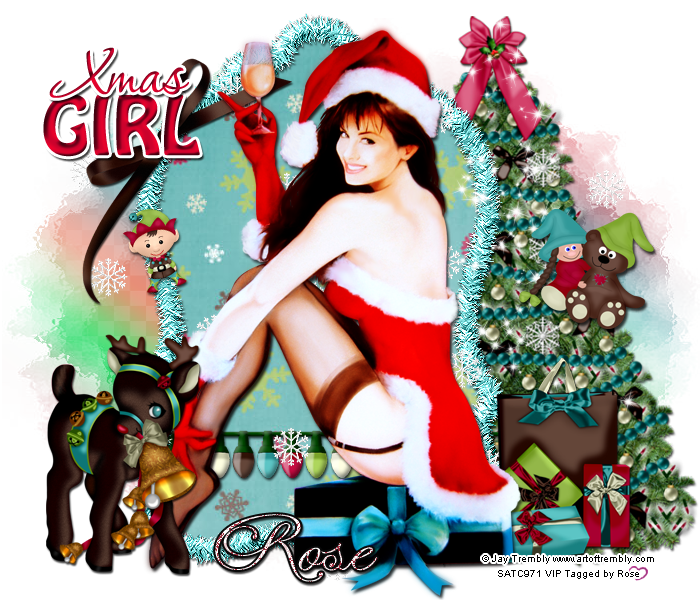
Open new image (ctrl+n) 700 x 600 pxl with white bg color
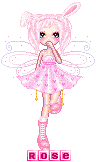
open element Grass, Log and mushroom. Paste them at center lower part of image
grass left and log, Mushroom (resize 40x40%) on right side.
Copy and Paste Element Door on grass little left side Use paper3 behind door element
Cut the paper sticking out the door layer
Open tube layer (Resize 70x70%) and paste it behind glass log and door layer
cut the lower part of tube as shown in image
Open Element Fairy1 (resize 20x20%), Flowers (resize 60x60%), Light2 (resize 60x60%),
bunny (resize 40x40%) paste them on left side of Door element as shown in picture
Open element Lights (resize 60x60%) paste it on upper side of the door
Open element Tree2 (resize 80x80%) paste it behind fairy tube layer
Open Element Sparkle1 paste it on center part of the image
Add mask layer behind all layers and add Gradient overlay (2 colors #f4b7c7 #a9b374)
♥ Add copyright info and license number correctly
Add Text (Garden fairies) add effects stroke (color white) , color overlay #2a4601
2nd Text layer (Name Rose) color overlay (green glitter pattern of your choice) Stroke color black
Add Text (Garden fairies) add effects stroke (color white) , color overlay #2a4601
2nd Text layer (Name Rose) color overlay (green glitter pattern of your choice) Stroke color black
Now delete your white bg layer and save your image as PNG
I hope you enjoyed this Tutorial
Saturday, 3 November 2012

Subscribe to:
Posts
(Atom)