


Tuesday, 29 May 2012

Tutorial written on 29th May 2012
This tutorial assumes you have working knowledge of Adobe Photoshop CS2
♥ Supplies Needed ♥
♥ Tube of Choice I used Beautiful Tube of Jay Trembly Pink Angle can be Purchased at SATC
♥ Scrap Kit of Choice I used PTU kit Angel Desire's By Inzpired Creationz
can be Purchased At SATC
♥ U Need SATC license Number
can be Purchased At SATC
♥ U Need SATC license Number
Font of Choice I used LainiedaySH
Mask of choice I used 103 Insatiable Dreams mask
Open new image (ctrl+n) size 700 x 600 pxl with white bg color
select rectangular marquee tool (m) and Create new layer and select it
and make box in your image
select paint bucket tool and fill box with white color
and name it (box 2 )
duplicate white box and resize it 95 x 90% (box 1)
open Paper 3 and 8 and cut according your boxes
3 for box 1 and 8 for box 2 , give black stroke and drop shadow to box one
and only drop shadow to box 2
open your tube and place your tube in your box one delete the tube parts sticking out.
duplicate tube and click Filter > Blur > gaussian blur > and apply sfot light
drop shadow your original tube layer
Open Elements Bow 2, clouds , cocktail 2, Frame 1, Heart 1, Lantern,
Mask, Shoe 1, sparkles 1
Place Frame 1 behind two boxes resize 70 x 70 %
Place mask on left upper side of the box resize it 50 x 50% and ctrl+t and rotate -25%
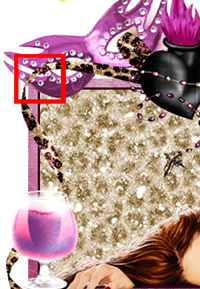
bow 2 on left side Edit > Transform > rotate 90% and resize 70 x 70 %
erase the bow part that is selected with red (in Picture) its like your bow is going inside mask :)
Place heart 1, on right upper part of the box and resize it 50 X 50 %
shoe 1 at upper center part of box resize 40 x 40 %
place cocktail on left side down resize it 30 x 30% and drop shadow
and lantern on right side down and resize 40 x 40 %
Click Filter > Render > Lens Flare > 50 to 300 zoom 100%
put the arrow at center of lantern click ok
place sparkles 1 and make a duplicate layer of it
place one layer behind lantern and other one behind Heart 1
place cloud center of box 1, behind the tube and delete the part sticking out of the box 1
add mask and i used # e67bb7 color for mask
don't forget to add drop shadow your elements
♥ Add copyright info and license number correctly
don't forget to add drop shadow your elements
♥ Add copyright info and license number correctly
now add text add effects stroke (color #6b013d) , drop shadow, color overlay (white)
outer glow (Color #f73595)
now delete your white bg layer and save your image as PNG
I hope you enjoyed this Tutorial 
Subscribe to:
Post Comments
(Atom)


0 comments:
Post a Comment