Tags, Extras, Freebie Cluster Frames, Banners, Stamps, Blinkies, Glitter tags etc
Date, Time
My Fairies


Followers
Saturday, 7 July 2012
02:53 | Edit Post

Tutorial written on 6th July 2012
This tutorial assumes you have working knowledge of Adobe Photoshop CS2 , Adobe Image ready
♥ Supplies Needed ♥
♥ You Need SATC License number to use this Art
Mask of choice I used 103 Insatiable Dreams mask
♥ Plugin Needed VanDerLee > Light
Penta >Jeans
Animation Here
♥ Plugin Needed VanDerLee > Light
Penta >Jeans
Animation Here
Font of Choice
Open new document 700x630 pxl with white bg color
C/p Frame at center of the image and resize 23x23%
now open tube select full tube layer and paste it on left side of the frame resize 80x80%
Open element Button (resize 70x70%), Cat (resize 50x50%), bow, skull (resize 70x70%)
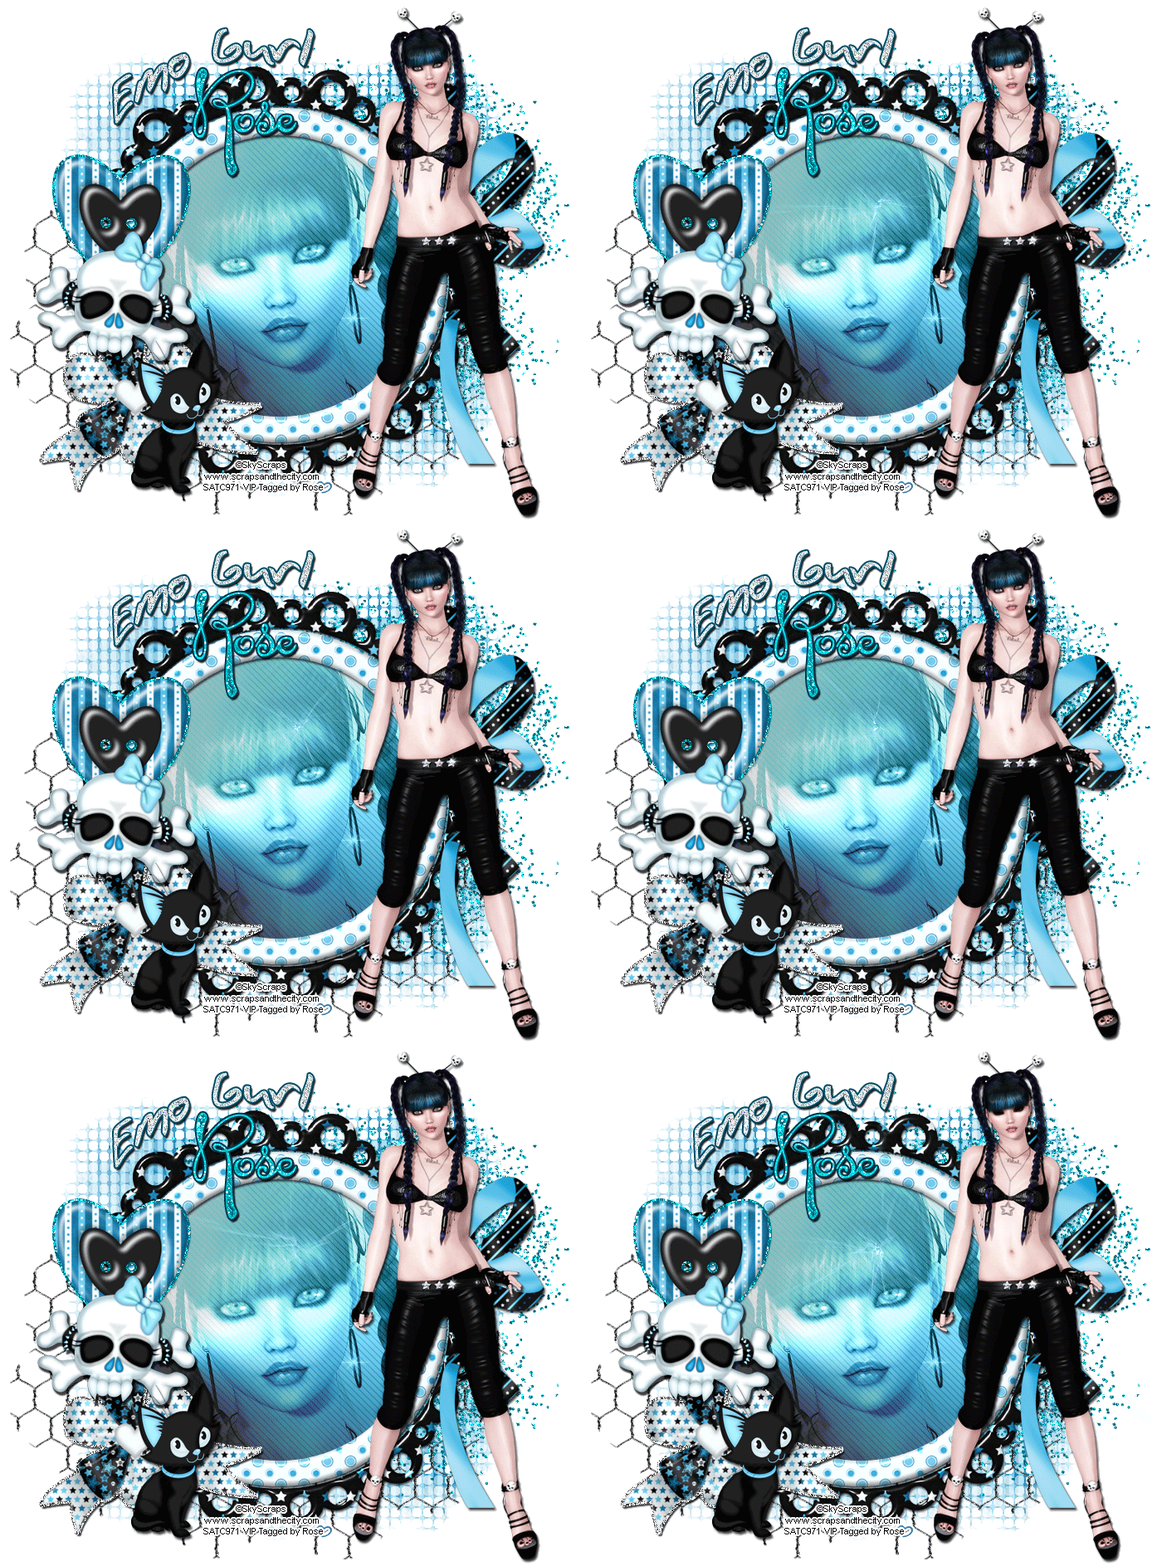
paste them on left side of frame as shown in my tag
Open Ribbon (Edit> Transform> rotate 90cw),
paste wire behind frame layer lover part
Paste glitter element on Right side of frame behind tube and frame layer
open tube and paste closeup layer in the frame cut the tube part sticking out of the frame
add bg to the tube behind frame layer
now add effects to colseup layer
Click Image> Adjustments> Hue/saturation (ctrl+U) > Colorize
hue 220
saturation 36
add Jeans effects border width 8 amount 12
now make a duplicate layer and
select duplicate layer and add VanDerLee > Light (color =#94eefe)
x position 29
y position 60
Angle 158
focus 51
set layer opacity 80%
add effects to elements double click button layer and add stroke (size 3) use blue glitter pattern of your choice in stroke and white glitter pattern (size 3) in bow
i also used blue glitter pattern in glitter element layer
For animation
open animation file and select all the frames and paste all layers on the closeup tube layer
make a new layer above the tube layer and fill the eyes part with black color (shown in image below)
on your new layer, dont color your tube layer, always make new layer

now add mask add pattern to your mask layer i used paper pp13
open tube and paste closeup layer in the frame cut the tube part sticking out of the frame
add bg to the tube behind frame layer
now add effects to colseup layer
Click Image> Adjustments> Hue/saturation (ctrl+U) > Colorize
hue 220
saturation 36
add Jeans effects border width 8 amount 12
now make a duplicate layer and
select duplicate layer and add VanDerLee > Light (color =#94eefe)
x position 29
y position 60
Angle 158
focus 51
set layer opacity 80%
add effects to elements double click button layer and add stroke (size 3) use blue glitter pattern of your choice in stroke and white glitter pattern (size 3) in bow
i also used blue glitter pattern in glitter element layer
For animation
open animation file and select all the frames and paste all layers on the closeup tube layer
make a new layer above the tube layer and fill the eyes part with black color (shown in image below)
on your new layer, dont color your tube layer, always make new layer

now add mask add pattern to your mask layer i used paper pp13
♥ Add copyright info and license number correctly
Add text, font of your choice add effects to your text stroke (color #00364b) , drop shadow,
add pattern of your choice I used blue and silver glitter patterns for text
For animation effects move your image to image ready. make frames according to your
animation file, I made 21 frames , set Frame delay time 0.1sec, and set the layer and
animation visibility with each frame
Hide Black eye layer visibility on all layers except layer 12 and 21
click play to check animation
Click Save Optimized as to save your animated gif image
I hope you enjoyed this Tutorial 

Subscribe to:
Post Comments
(Atom)
Search
Categories
- Extras (136)
- Bibi's Collection (78)
- Tags (75)
- SPU (73)
- TPP (61)
- Tutorials (42)
- SATC (41)
- Animated (17)
- Fb Timeline cover (15)
- Cluster Frames (9)
- alfadesire (9)
- Blinkies (7)
- Banners (6)
- FTU Tutorials (3)
- Desktop Background (2)
- Greeting Cards (2)
- Stamps (2)
- Wallpaper (2)
- Word Art (1)
Archives
- January (3)
- December (3)
- November (4)
- October (9)
- September (11)
- August (8)
- July (8)
- June (10)
- March (11)
- February (6)
- January (4)
- December (8)
- November (12)
- October (7)
- September (20)
- August (8)
- July (10)
- June (13)
- May (20)
- April (11)
- March (14)
- February (8)
- January (9)
- December (12)
- November (8)
- October (6)
- August (1)
- July (5)
- June (3)


Love it!!
ReplyDelete