


Sunday, 27 January 2013

Tutorial written on 27th January 2013
This tutorial assumes you have working knowledge of Adobe Photoshop CS2
♥ Supplies Needed ♥
♥ You Need SATC License number to use this Art
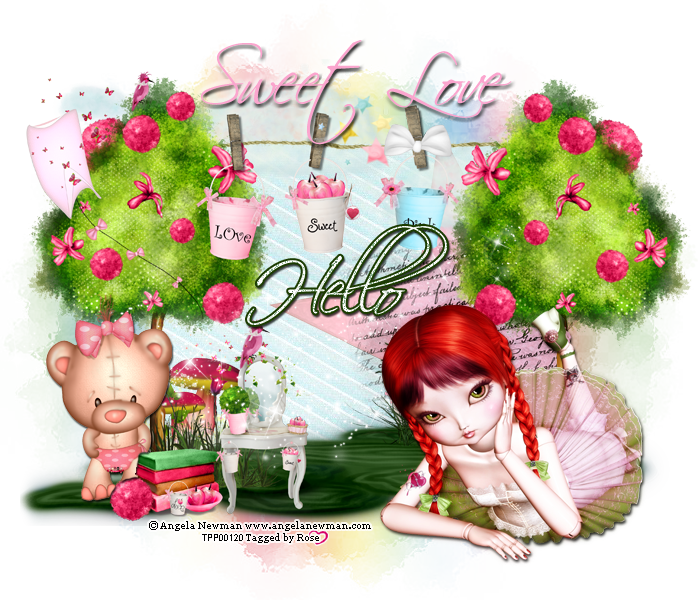
Open new image (ctrl+n) 700x600 px with white bg color
Open Template in image and resize 90x90%
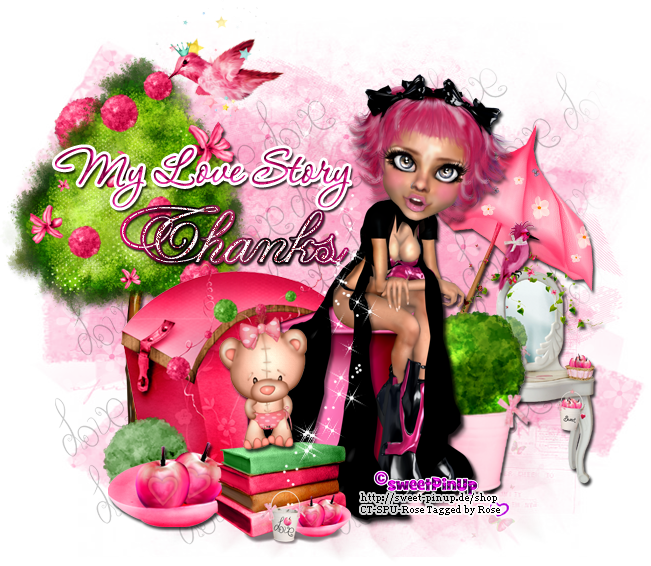
now add effects and papers on template
select raster 2 layer add white or silver pattern of your choice
add color over lay #b40e5f on raster 9 layer
Select raster 3 layer use pattern paper 10 from scrap kit
Add Golden or yellow Glitter pattern on raster 4 layer and 4 copy layer
Use Light pink glitter pattern on Rater 5 and add stroke size 2 color #b40e5f
Now Select 3 Black Box layer and add pattern paper 1 from scrap kit
Add silver pattern on raster 8 layer and same pattern on raster 6 layer
Now Open Tube file and copy paste layer 21 resize 25x25%
paste it on center black box cut the tube's lover part sticking out the box
Open Element 19 paste it behind all the layers little left side of template
Open element 67 paste behind template at center of image
Open element 23, 35 (resize 40x40%) and 54 paste them on right upper part of
template and Open element 5 (resize 70x70%), 26 and 39 paste them on
lover left side of template as shown in image
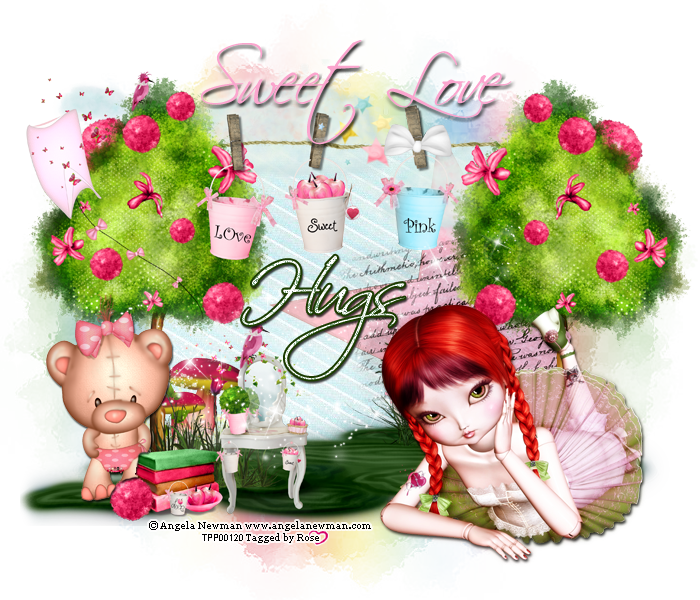
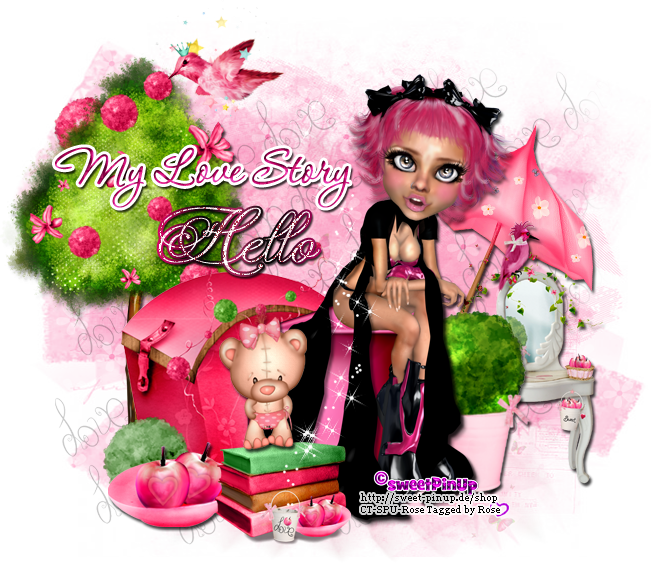
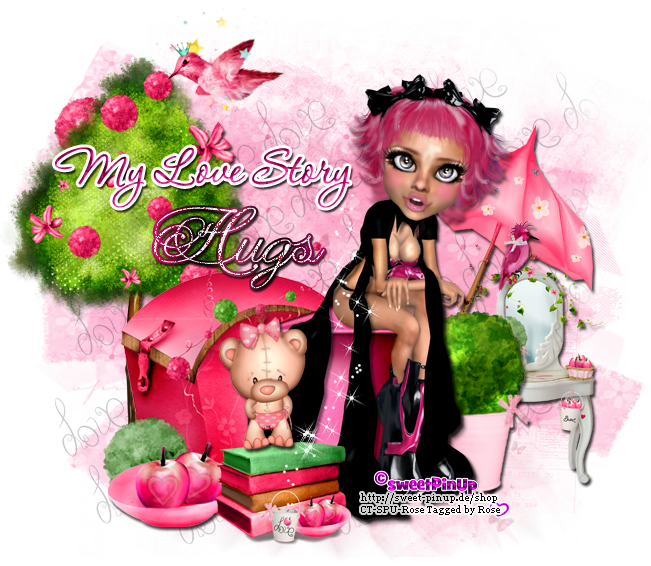
Now Open element 25 (resize 50x50%) and add color overlay #fb7bab
and 63 paste them at upper part at Tube elf hand as shown in image
and 63 paste them at upper part at Tube elf hand as shown in image
♥ Add copyright info and license number correctly
Now add text (all it takes) add effects stroke size 2 (color#white) ,
drop shadow, add color overlay of your choice i have added black color
Add Text (fairy dust) add effects stroke size 2 (color#white) ,
drop shadow, add color overlay of your choice i have added #b40e5f
Now add Text (Name) add effects pattern overlay i used pink glitter pattern
add stroke color ##b40e5f drop shadow
Now delete your white bg layer and save as PNG
I hope you enjoyed this Tutorial 
Tuesday, 22 January 2013

Friday, 18 January 2013

Tuesday, 15 January 2013
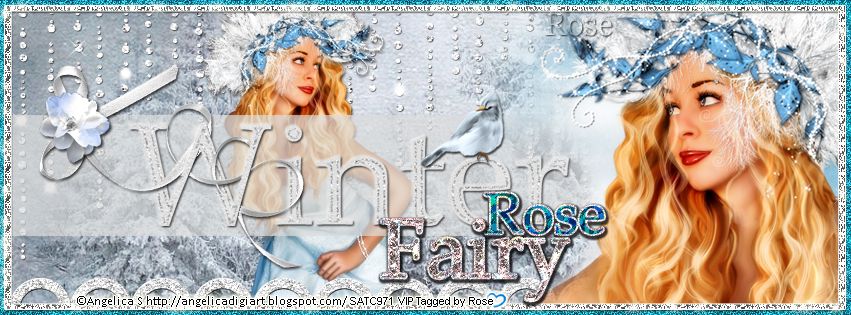
Tutorial written on 16th January 2012
This tutorial assumes you have working knowledge of Adobe Photoshop CS2
♥ Supplies Needed ♥
♥ You Need SATC License Number to use this Art
♥ Font of Choice I used Palatino Linotype
Open new image (ctrl+n) 853x315 px with black bg color
Select Rectangular marquee Tool > Set Style Fixed size 840x303px
now click on your image and make rectangular box with Rectangular marquee Tool
fill it with color with paint bucket tool Name it white box
open Scrpkit paper 5 (resize 105x105%) paste it on image white box
and cut the paper part sticking out the white box
and cut the paper part sticking out the white box
double click layer and apply stroke add glitter pattern i have added silver glitter pattern
Open tube file copy and paste closeup tube layer (resize 80x80%) on right side of boxcute the tube part sticking out the white box
now copy 2nd layer of tube paste it at center of box (resize 40x40%) Filp horizontal
Open Element Bling rain behind tube layers
Select Rectangular marquee Tool make wide box with it
as shown in image below
fill it with paint bucket color #dbdcdc and reduce opacity 70%
Open WA3 Element paste it on box resize 70x70% add drop shadow
Open Element Bow1(resize 60x60%) and Flower1 (resize 20x20%) paste
them on upper left side of the winter text box
Copy Bird Element (resize 20x20%) paste it on letter E on Winter text
copy paste element Circle line on left lover part of image as shown in image
them on upper left side of the winter text box
Copy Bird Element (resize 20x20%) paste it on letter E on Winter text
copy paste element Circle line on left lover part of image as shown in image
♥ Add copyright info and license number correctly
Now add text Fairy add effects stroke size 2 (color#white) ,
drop shadow, add pattern overlay of your choice i have added silver glitter pattern
Add Text Rose (any name u want) add effects stroke size 2 (color#white) ,
drop shadow, add pattern overlay of your choice i have added blue glitter pattern
drop shadow, add pattern overlay of your choice i have added silver glitter pattern
Add Text Rose (any name u want) add effects stroke size 2 (color#white) ,
drop shadow, add pattern overlay of your choice i have added blue glitter pattern
save your image as JPG
I hope you enjoyed this Tutorial
Subscribe to:
Comments
(Atom)